Overblog
Suivre ce blog Administration + Créer mon blog

diy

Sewing a Skirt from a Vintage Burda

Publié le par Charly C.

Hello, all!

I don't know how many of you remember that last year I did something called Blog-March. There aren't many entries to check out, sadly. This year, I decided not to participate anymore.  

In this entry, i mentioned i made a green skirt, perfect for Saint Patrick's day, celebrated on March 17th. I believe I also mentioned i might share how I made it and so on. Well, today is the day this will happen. And as it happens, it is now May that i finally manage to gather my thoughts related to this entry and complete it.

green skirt slow fashion sewing diy clothes Burda Moden
Please ignore the wrinkles..

SKIRT DESIGN

I found the skirt in a vintage Burda magazine, from May 1996! I posted a quite short browse-through of this issue, in this entry, if you're curious. 

Below, you'll see what the skirt is supposed to look like, according to the magazine. The skirt has 2 front panels, 2 back panels, pockets, a waist band, as well as panels for the buttons and button holes. 

Skirt 107 from Burda Moden 5/1996
Skirt 107 from Burda Moden 5/1996Skirt 107 from Burda Moden 5/1996

Skirt 107 from Burda Moden 5/1996

As you can see, Burda is rating the difficulty of the designs it shares. I think the rating is from 1 to 4 or 5 dots. This skirt has a rating of 2 dots, making it relatively easy to make. For those confused, in the picture with the model sitting, 106 represents a body. The skirt has the number 107. 

The difficult part is the pockets. I believe there's a sewing lesson with how these pockets must be done. Let's just say i simplified my life by not using any pockets initially. I only added them last month, but i'll talk about that later. 

The sizes of the skirt are European 36 through 44, where 36 is a Small and 44 is a Medium? In Burda, 44 is the smallest size for the garments dedicated to "Plus Sizes." According to the measurements in Burda, i'm size 44 and so this is the one i traced and made. 

It seems i have no picture taken of the traced pattern, just this copy i made in order to make a patchwork skirt. This is what i'm currently working on. One of the projects. 

The skirt is supposed to be 80 cm long. I don't know why i remember adding a few more centimeters to this, but i'm not sure i did. 

Sewing skirt with vintage Burda 5/1996 pattern

FABRIC

As far as fabric goes, i had this green fabric i found at the dumpster. It was a neighbor who got rid of several lengths of various types of fabrics. The colors and overall design also differed. 

In the next pictures, i'll share, you'll see the color changing. This is because i was working in the evening, and my light was crap.

I believe the weave is a damask. I'm not sure what the fiber is. The burn test indicates cotton or similar, as it smells like burned paper. It is relatively heavy, so it hangs nicely. 

However, i didn't have quite enough fabric to make the skirt as it was indicated, or perhaps I wanted to make things a bit easier on me. I forgot. This means i cut the back part on the fold, giving me one less seam to sew. 

Cutting the panels and sewing them together was very easy, and nothing to write home about. The next step i took was to attach the panels for the buttons and their respective holes.

This was also pretty easy: I sewed pretty sides together, then i sewed by hand on the back (i think). This way, the raw edges were enclosed in the button bands. The next step i took, was to install the waistband. I redid the process, though i do regret not reinforcing in any way the waistband. 

Then i had to hem the skirt. i made some sort of maybe bias? tape out of an underskirt i somehow i also found at the dumpster. The original item had nearly the same shade of green as the skirt, as you can see in the next picture. 

Buttons and Closure

The skirt is supposed to have real buttons down the front, however due to my fancy-looking fabric, i didn't think this would be the best choice especially since the buttonholes had to be done in the fabric. My next option was to install a zipper, but i'm not that good in this department and i wasn't thrilled by this idea either. 

green skirt slow fashion golden buttons sewing with burda
testing out some golden buttons. i liked the look, but i didn't lik the buttons up-close

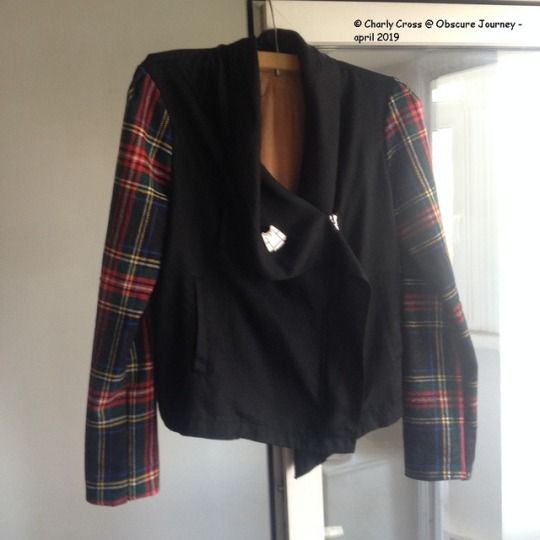
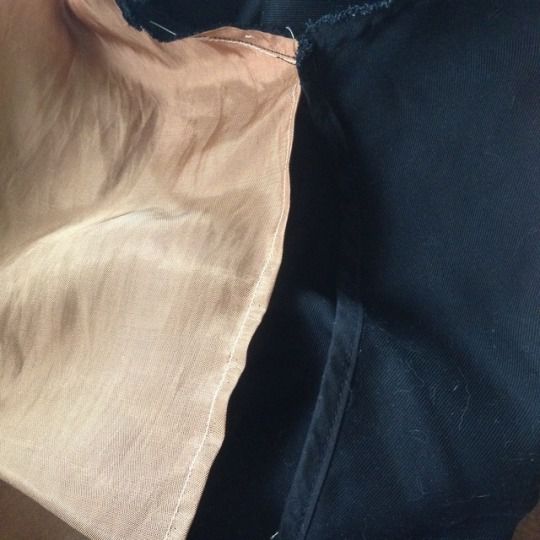
A brilliant idea came to me when i realized i can use snap buttons hidden by fabric-covered but fake buttons. I had some on an old silk jacket, so i undid one of those to see how they're made. I noticed that it had 2 layers of material, one the size of the button and the other one, larger. I then copied the fabric outline onto paper, to make patterns.

golden buttons damask silk close up
Closeup of the buttons i was considering and the one i copied

Once i had the patterns, i cut out the fabric, and i started covering my buttons. I luckily had some old, ugly, blue buttons that have the same size as the original.

The first step was to stitch a simple row around the edge of the fabric, put the smaller piece on top, then the button, and then pull the thread to close the fabric like a really small sack. The last steps would be to secure the fabric around the button with a few extra stitches and then to attach the new button to the skirt. 

Refer to the next pictures for a better mental image regarding this process, along with a comparison to the original button. 

Sewing a Skirt from a Vintage Burda

It would probably have been easier if, for the smaller pieces, i would have drawn circles directly with the button, but the idea just occured to me now (more than a year after i completed the process). 

For the snap closure, i had to go to the haberdashery to buy the snaps. Luckily, i found and they were affordable. They’re the same diameter as the buttons. I sewed the snaps first, then the fake buttons on top and I really like the result! The swish! factor is 'chef’s kiss' 😗

sewing Burda may 1996 green skirt handmade

In this picture above you can see the hem of the skirt on the inside. That green band used to be some petticoat maybe? but it couldn't be used anymore - i forgot why. So i cut strips of some 7 cm? (3 inches? about?) and i sewed them together, to form a VERY long ribbon.

I know for sure i didn't cut the fabric on the bias but on the grain line. Then, the very long ribbon i sewed by machine to the very (not even) edge of the skirt, and then i sewed it by hand to hide ALL raw fabric edges. The best part about doing this is that i was able to more or less even out the skirt's hem and the result is rather professional looking - if you ask me.   

This year (2022) I decided I wanted pockets in this skirt even if the fabric is fancy-looking. Look, pockets are useful even in a fancy-looking garment, ok? for this, I had to take the easiest route, and that was to open the seams of the skirt. Look it up all you want: seam pockets are the easiest to make, even in already bought garments. 

However, this is will require an entry of its own. This one already became too long. What i want to say is that i really like the result and i think it looks BETTER than in the Burda sewing magazine. 

©Charly Cross 2013 - present. All rights reserved.

Do you want to buy me a coffee? this is a 1-time donation, thank you very much!

Voir les commentaires

Browsing Burda May 1996

Publié le par Charly C.

Hello all! 

This is a pretty short entry as I want to present to you all, the Burda magazine for May 1996! 

I made a video browse-through of still pics with transitions and some notes, and even though it doesn't sound as interesting as it should, it did require some work on my part. 

I think it took me some 2 hours to put it together, without the taking pictures part.

Why is this issue important? No particular reason, This is currently the oldest Burda issue I own and I already made a pair of pants twice, in 2 different sizes. You can read more about the process here.

If you're wondering why i didn't post this entry on my Being Obscure reviews site/blog, is because I don't review the magazine. i just make a browse through. 

There's barely any commentary and all of it is written as captions. I think it fits more here. 

I hope you like the issue, and it's just in time for the month of May of this year. 

I have another browse through to prepare for June, but the year is 2013. Stay tuned for that! 

That's not the next issue I own, chronologically, but the one that fits with the time of the year. I hope you're OK with my choice.  

© Charly Cross 2013 - present. All rights reserved.

Voir les commentaires

Blog-March: 7 Challenges

Publié le par Charly C.

Hello all!

So, in my previous post, I told you about the challenge with the subjects to write about in March. 

This time, I have to update you on 7 challenges. However, some of them have no signification for me, so the entries would have been too short. I'm not particularly fond of very short entries, so here I am. 

First, let's see again which are the challenges or topics I'm supposed to write about, and right after that, I can start completing the tasks. 

March 16 - International day of being nice while driving

I don't really know how else to translate that. 

What can I say? I don't drive. I did notice how some drivers thank one another for being left in front, so I imitate that when drivers let me pass. 

What I appreciate more than anything, is silent cars. Please, if you drive, don't blast the music that can be heard a mile away. Also, you don't need a very upset engine with a loud exhaust pipe or whatever it's called. That's very disturbing for passers-by. 

If I ever learn how to drive and get a car, I'll search for the most silent car. 

March 17 - Saint Patrick's day

We don't celebrate this in Romania. I have no idea what this celebration is all about. All I know is that people like to wear green if they celebrate. 

-15 minutes later- reading about him, I learned he brought Christianity to the Irish people and he explained the Holy Trinity with a shamrock. 

Despite all this, I was prepared to celebrate it because the previous day I had just completed the following skirt!

Burda green skirt

I should probably retake the photos of this skirt because the color is blue-ish here. But the real color is a deep BEAUTIFUL green. And I should also press the skirt. 

On the upside, this picture was taken on this day, March 17. 

March 18 - World tourism fair

I have nothing to say about this day. Going on a trip is a bit difficult currently. Travel has more purposes - relaxation, helping one refind some inspiration, and discover places. 

I can't travel so I'll share 2 pictures instead. I think these pictures can help with discovering places and find some inspiration. 

autumn fall dead leaves sidewalk bucharest city street

This is a street in the heart of Bucharest. I walk on this street a few times per month. This is the view to home. The date was Nov. 2020. 

lake bucharest

This picture was taken back in Aug. 2017 when we visited a cemetery near the city. 

March 20 - World happiness day 

I think this is what the French means. 

These days I can get at least more cheerful when seeing certain items. That I received as a gift for this past Christmas. They are actually 2 items.

The first of them is a plate covered in strawberries, made by CLAYRE & EEF. This is NOT an affiliate link. This is a link to the official page of the brand. I wasn't able to find the plate there anymore. 

While the above plate cheers me up while eating, it has nothing on the next item:

This picture doesn't come close to telling you how stinkin' cute these Christmas avocadoes are. They SO. FRICKIN'. ADORABLE!!!! I really have no words to express myself. 

And since these are socks, the avocadoes become larger on the feet, then they return to the original size. These socks are from H&M. I wouldn't have bought them if I were looking to buy socks. But, BOY AM I GLAD I got them as a gift! 

I hope you can cheer up seeing their happy faces.. I'm losing my mind over here... 

March 21 - Spring Equinox

Welcome spring! I really feel and think spring came when I can see these flowers in bloom - see below.

These are not cherry blossoms, but very similar. They have a faint, nice smell that I can't have enough of. 

March 22 - International Water Day

Water is important for life. Correct. But lately, I only had bad luck with water... I have nothing to say more about this. 

March 25 -World Procrastination Day

How ironic that precisely on this day I get to post such a long entry. But that's because I use almost the whole year to procrastinate. 

This is it for now. Most likely, the remaining challenges will be grouped in a single entry as well. 

See you then! 

© Charly Cross 2013 - present. All rights reserved.

Voir les commentaires

Making Victorian-inspired pantaloons - Sewing with a vintage Burda

Publié le par Charly C.

Hello.

In November I had some time to make something and to even finish it. YAY!

Disclaimer: Well, I'm not sure they're really called "pantaloons" but this is what I'll call them in this article. I say they're Victorian-inspired because they have frills and lace. 

INSPIRATION

My inspiration came from 2 places if I can call them that. 

The first place is Subeta's (that is a referral link to this online pet and dress-up game) Magical Pirate Pantaloons of Sweet Love - you can see them here (This is a fan-made and helpful site for those playing Subeta).

The above image belongs to Subeta - used for informational purposes.

The second place is Bernadette Banner's video in which she makes a pair of Victorian underwear or combinations. You can watch the video here. She uses historically accurate fabrics and methods, including or especially hand-sewing. 

The end result is closer to the Pantaloons of Sweet Love mentioned above, as you'll see from the pictures. 

WHAT DID I USE

Fabric: As for fabric, I used some blue and very thin polyester fabric I had. Despite it being polyester, it feels quite nice against the skin. 

Pattern: For the pattern, I had nothing "historical" or something made for a (Halloween) costume. I had this May 1996 Burda magazine that had a pattern I could use. 

I needed some loose trousers with the simplest pattern possible. This one had just 2 pieces and was very loose. What else can I ask for?!

Other supplies: a pair of shears, matching thread, sewing machine, some elastic (not included in the picture), hand-made lace, and chord that i just had on hand. The lace and chord were either given to me or i may have found them at the trash

The white lace is the remaining piece from what i had. Because it didn't occur to me to take pictures BEFORE i use it. Click here to see a close-up of the lace and the chord thing. 

WHAT DID I DO

As you could imagine, first I had to trace out my pattern pieces and to cut the fabric. As a matter of fact, i wanted to make these Burda trousers for Anna, a while back. So i had the pattern already traced out and cut. 

I only needed to cut the fabric. I folded the fabric in half, placed the paper on it, and cut with no seam allowance. This design is quite loose, therefore cutting with no seam allowance is fine. Otherwise, Burda patterns require you to add 1 cm (about half an inch?) of the seam allowance. 

The next step was to sew 1 front piece to a back piece, then to sew the crotch. And at this point, you have a pair of trousers. I made a channel for the elastic at the waist, out of the pants - the design has a quite long crotch area, and therefore, you have plenty of fabric to just roll the top inwards twice for this purpose.  

As you can see, my seam allowance is pretty small, but enough.

You can use elastic or a chord. This depends on whether you just want to pull the pants on or you want to bother to knot the chord, as the line drawing suggests. For me, the elastic was just SO easy! 

And now comes the part where i made my first mistake which made things a bit more difficult for me. I constructed the trousers BEFORE i added the lace or formed those ruffles or channel for the knee elastic.  

If you ever sew something, you would know it's easier to put ruffles on something when the item is flat/2D and not in a 3D shape. I think i would have been more accurate as well. 

My next steps were as follows:

I measured about the place where i want the elastic to be, made the channel for it, eyeballed the place of the first ruffle, eyeballed the location of the hem, and completed the first leg. 

I assumed that finishing 1 leg and then doing the second one would be easier. I'm not sure if it was or not, but it did feel that way.  

Another mistake was not to measure the white lace, to ensure i have enough. From my eyeballing, it looked as if i did have enough. By now, you already know my guess was correct.

However, while I was working on the project, i had my doubts when time came for me to complete the second leg. I suggest you measure everything ahead of time, unless you trust your eyeballing guess. I'm pretty good at guessing, and this is why i didn't do the sensible thing of measuring. But I shall in the future. 

Once the ruffles and the lace were installed, the pantaloons were done! YAY! Now (as I type this), they're packed and hidden, as they're a gift for Anna. You'll be reading this after she gets her present, sorry. 


Previous Experience

What i want to also mention is that i actually worked with this pattern once before. 

I made a pair of trousers for myself, last year in October. Back then, i used this pinkish silk fabric, that only later i realized it could be silk and i nearly fainted. I was either brave or decided to just go for it, and make myself some trousers. 

That being said, this is how my pair turned out. There are many mistakes to be seen up-close. From further away, you can't tell. 

For Anna, I used size 36 -the smallest available and for myself size 44, the largest available. I chose the sizes based on our measurements, but i didn't measure the pattern pieces themselves to see how large the finished garment would be. 

For my pair, i tried leaving 1 cm of the seam allowance. My pair is a bit too roomy. It's because of this previous experience with the pattern that i knew not to cut with a seam allowance this time around. 

As you can see, the expectation VS reality hits again, hahaha. Don't ask about what i'm wearing - at the time i thought it looked OK. The top is also hand/home-made, but it's a hand-me-down, so i don't know the pattern nor fabric. 

Yes, sadly, the picture with me is not complete, therefore you can't see these pants are a tiny bit short on me. But this is because I'm taller than most and the pattern is for regular-height persons. 

© Charly Cross 2013 - present. All rights reserved.

Voir les commentaires

Blogmas days 19 through 22

Publié le par Charly C.

Hello Everyone!

This entry is a short overview of Blogmas days 19, 20, 21, and 22. The challenges for days 23 and 24 have never been posted. Even the challenges for these 4 days appeared much later. 

With all these aspects taken into account, this will be the last blogmas entry for me, for this year. 

I'm writing this on the 27th, but thanks to some functionalities, I can post this on any previous day I want (as I type this, I'm still trying to decide on which day to post this). Someone who will read this blog for the first time in the future, will not know without this disclosure. 

I just wanted to mention this, so that those of you who visit my blog will not think your brain is playing tricks on you. 

On with the challenges, shall we?

DAYS 19 and 20

I put together these 2 days because they have the same challenge: finish up the gifts for Christmas

I gifted my partner mostly on Hanukkah and on the virtual-pet site we play. You can read more and see here the gift I prepared for them. 

I still prepared another gift for them. This time a satin poncho/wrap/thing that looks as if it could be some pajama top or cover. 

It can be worn anywhere, any time almost. I want to write a blog entry about how I made it and everything, so please keep an eye out for that. I want to post it before the New Year, but we'll see. 

DAY 21

The challenge for the 21st day of blogmas was to draw a line/conclusion from the statistics (of the blog). 

So, i posted  during 10 months out of 12 in 2020. However, i had people visiting my blog every month. I'll share the data here for transparency, as well as for me to find it easier if i ever want to look back on it (in December 2021 for instance). 

statistics
MONTH #posts VISITS VIEWS
january 3 86 111
february 3 43 49
march - 102 143
april 3 219 252
may 2 111 130
june - 81 100
july 2 80 106
august 2 95 127
september 1 125 171
october 2 218 288
november 2 127 167
december 16 174 213
TOTAL 36 1461 1857

The article with most views is "What is tea like in Romania." I posted a total of 36 articles in 2020, this one not included. 

The only thing i can think of that drove more visits was that i was probably more active on various forums where i have links to my blog/site in the signature. 

DAY 22

For the 22nd day of the blogmas, all we had to do was to enter a contest for a free business account for 1 year! And of course i entered. 

and....

I WON! I WON! I WON! 

I can't believe i won! 

The cost of the Business account is 239.88 euro per year. I had an Individual (lower) account that costs 59.88 euro per year. Those who choose to pay every month, have to pay 23.99 euro/month (or 287.88 euro per year) and 5.99 euro/month (or 71.88 euro per year), respectively.

Now I have to post as much as i humanly can, to take advantage of this offer. 

See you next year!

© Charly Cross 2013 - present. All rights reserved.

Voir les commentaires

Expectation VS Reality - DIY edition

Publié le par Charly C.

Hello there!

Did you expect to see me? neither did I. 

Do you know how people order things online hoping they'll receive something cool, something they think will look good, will make them feel better, and so on and so forth? 

I have done that. But i didn't expect things to be THAT amazing, to begin with. You can read more about that experience in this entry

So this entry is not about my expectations being ruined by a bad online shopping spree. Instead, I want to talk about a DIY project a did over the past 2 or 3 weeks. Well, i finished it last week.

I didn't plan on writing about it. However I shared it to this FB group and 87 people liked it and congratulated me for the result. 

The story goes something like this: 

When the stores finally opened back at the beginning of summer, fiance bought a small white Guess bag from an outlet. 

It was in a decent shape, with the only flaws being the several visible stains. On both sides. Unfortunately i don't have a picture of the bag :( 

I thought we can clean it. [FIRST EXPECTATION!]

[FIRST REALITY] hit when after several attempts, and several products, we realized that taking those stains out won't work. 

The DIY project begins!

THE SOLUTION TO THE PROBLEM

The solution we came up with, was to paint the bag. At least on the front.

This was a pretty easy idea to put into practice. All i needed was:

  • acrylic paints - done!
  • paintbrushes - done!
  • inspiration 

The inspiration came from a google image search. I searched for "an easy acrylic painting" or something along that line.

And I found this picture: [EXPECTATION 2]

I thought it's a decently easy image to reproduce. So i started working. 

First, i used a pencil to draw the circle in the middle, and 2 vertical lines in the middle to "split" the background into the night/day halves. I also drew the curved line for the crescent moon and the "flames" around the sun. 

This part was THE easiest to complete. 

I then started painting and i used the lightest colors first. 

I don't have much to say about the painting process. I tried to make sure i don't leave white spots as the surface of the bag is textured, not smooth, as you'll see from the pics below. 

So, this is what I got. [REALITY 2] it's not AS pretty as the inspiration photo, but it's alright. I think. 

And when you open it, you get almost the same image. I didn't want the image to be split or incomplete when open. I also have the impression it looks more "intended this way by the designer" and not "oh, I painted this and did the shittiest job."

It had 2 loops for a shoulder chain. My fiance said they'll use it more like a wallet than a purse, therefore, I thought that keeping the chain would be in the way, in a bag. 

I hope this entry inspires you to find a solution when your favorite bag gets dirty and you can't clean it, and you also don't want to get rid of it. 

I didn't use a sealant, but I should, and I'll be looking for some sort of sealant. The light blue side is a bit sticky to the touch even though so much time passed since I finished this project. So, if you do this, make sure to use a sealant. 

See you in the next one!

© Charly Cross 2013 - present. All rights reserved.

Voir les commentaires

My Crafting Books

Publié le par Charly C.

Hi all!

I think it's time for me to talk to you a bit about the books I own that help me with sewing or crafting stuff in general. 

DISCLAIMER: Bear in mind that some of the links in this post are affiliate links and if you go through them to make a purchase I will earn a commission. I used these affiliate links to give you the option to check the book out, for yourself, if you so wish, through a well-trusted seller. While I will be very glad if you buy any of the linked items, the decision to do so or not, belongs to you. Thank you for reading!  

I own books, magazines, and some leaflets. I will talk about a few of them in more detail than about others. I'll also mention which are the ones with more interesting projects and stuff. 

Gotta mention that I didn't read them all. I didn't have enough time to do so. At least not yet. Plus, some of them are not really for reading as they have just projects and how to do them.

Most of these books are in Romanian, and I'll put them last. or after the ones in English. 

I have also 3 books that are more useful for those interested in fashion per se. I managed to read 1 of them, and about half of each of the other 2. 

My Fashion Related Books

These are my fashion related books. More fit for a coffee table, i suppose? But I don't have a coffee table, so they'll live with my craft books. 

  1. Elsa Schiaparelli's Private Album -affiliate link- 
  2. Vintage Fashion -affiliate link-
  3. Fashion Designer's sketchbooks (2) -affiliate link-

One is about vintage fashion through the 20th century, one is about fashion designer Elsa Schiaparelli, and the other one talks about the process used by fashion designers to create their clothes. 

The book on vintage fashion is interesting for those who like or want to dress in the style of a decade of the past century. You get to discover designers, the silhouette promoted at the time, along with some historical context. 

It is through this book that I got an interest in Elsa Schiaparelli, and I was pretty excited to buy her Private Album book. I will talk a it about this book on my Obscure Reviews site, and I'll add a link here when that happens. 

To learn more about the creative process in the Fashion Designer's Workbook, there is a little interview with the featured designers as well as a little presentation of their sketches and a few of the finished look. I have to mention this is the 2nd volume. 

Various Crafting Books

Here are 5 crafting books:

  1. made at home -affiliate link-
  2. biblioCraft -affiliate link-
  3. 18th Century Embroidery Techniques -affiliate link-
  4. Simple Contemporary Quilts -affiliate link-
  5. Easy Embellishments for Creative Sewing -affiliate link-

From this list, I read half of the 2nd and the 3rd. I also read a bit of the first. If you're interested in reading a bit more about the "made at home" craft book, I have a review on my Obscure Reviews site

What can I say about these books is that they give a bit of introduction to present the book. They also give plenty of rather easy projects you can do, with step by step instructions. 

On top of this, you also get to see the final result. The made at home, Contemporary Quilts, and biblioCraft are books mostly for making home decor items. Or items you can use around the house, such as tea towels, pillow covers, quilts, and more. 

The Easy Embelishments book shows projects that you can do for your clothes. If you need some ideas or a bit of guidance for upcycling this book can be useful. This is all I can remember from it from just browsing and looking at the pictures, as I didn't read it.

The book on 18th Century embroidery techniques is quite interesting. It talks about methods, shows pictures of embroidery done at the time, where can it be seen, and more. 

Expect a review of this book on my site, at some point, and this post updated when that happens, because I am reading it, as I already mentioned. 

Romanian Crafting Books

There are quite a bit of crafting books in Romanian, that I own. About 4 of them are specifically with traditional embroidery or cross-stitching designs. One is about crocheting and making these interesting lace doilies. Though you can use them for whatever other purpose. You can see an example in this Instagram post i made last year.

Two or 3 of the books explain how to make your own patterns for various types of clothing. They rather lack explaining how to place the pattern on the fabric, which is the preferred sewing order, and so on. I think they were aimed at more experienced dressmakers and not beginners.

I used one of these books to make a/the pattern for an ankle-long cape. If you're interested in a post related to how that went, I'll be happy to talk about it. 

These books are from the 1970s and 1980s. The one on top, called Almanah Femeia is a booklet or a tiny magazine. It features knitting, crocheting, and embroidery work. 

The tiny book in the right upper corner is where I found the design I used on my jeans jacket. And if you have no idea what I'm talking about, last year i embroidered my jeans jacket. And I talked about it in this entry

The same book also had the design you can see on the big doily in this IG post from last year.  And here you can see it being worked on. 

Here you can see some work in progress on a bookmark with a design from the yellow book. And here is the final result.

Burda Magazines

There's not much to see here. I bought the most recent issues starting with August 2019. The older issues I found next to the trash. The oldest issue is from 1996. One issue is in Hungarian, and that's the only one I can't read. But if I get more experience in dress-making, I won't need instructions. The others are in German with Romanian translations (in an insert). The translations are only for the sewing instructions, not for the few of the extra articles. 

I also don't have much to say about these magazines, except that the issues became slimmer and slimmer. In the 1990s, they featured recipes as well, and some crosswords which allowed you to enter contests and win things. Then, they also featured pictures from the readers, with the clothes they made with the help of Burda. 

I didn't include the leaflets in here. I may make a separate post for them as they're printed on newspaper paper, and they got old and fragile. I'm keeping them safe. For now. 

© Charly Cross 2013 - present. All rights reserved.

Voir les commentaires

How To Enlarge a Tshirt - DIY, Upcycling, Color-blocking

Publié le par Charly C.

Hello!

Today I have a solution for old clothes that don't fit anymore, and thus they sit in the closet, collecting dust. This solution will save your wallet, give a new life to both your clothes and wardrobe, and create a unique personal style, because YOU ARE unique!  

Most clothes that we buy come in standard sizes. They assume that if your hips measure 100cm, then perhaps your waist is around 80 or 90 cm. This is not always the case. they make clothes in standard proportion, but our bodies are not always proportionate. 

My body for instance, is as much as an hourglass as it can, hence there's a significant difference between my waist and bust, and waist and hips. However, if it wasn't for my chest, i could fit into tops that are sized Small because my rib cage is pretty small. 

So, back to topic. I had these 2 tshirts you can see below, but i can't wear them. The light green one is too transparent for my tastes :( The other one was extremely tight. 

How To Enlarge a Tshirt - DIY, Upcycling, Color-blocking

I liked the beige one more than the greenish one, so i wanted to wear that one But i had to be larger.

I measured it against a tshirt with a fit that I liked. In my case, i needed about 32cm more fabric.

The idea was to find strips of fabric that were 16cm wide, cut the side seam on the beige tshirt, and attach the strips to the new edges. 

This is where the greenish tshirt came in handy. It provided it side seam, already had hems, and was a very similar fabric to the other one. At least in weight -very light weight, and feel - very soft and comfortable, breathable. 

I measured, marked, cut and proceeded to sew. the pieces in. I measured 8cm on each side of the greenish top. Since it's already folded, 8x2=16, 16x2=32. 

I think i should have used straight strips of fabric, and not the seam sides of another tshirt with a different cut. It turns out, the greenish fabric was somehow loner than the beige tshirt. I had to create some pleats, to make them match. 

How To Enlarge a Tshirt - DIY, Upcycling, Color-blocking

When laid flat, the new tshirt looks off, but on me, it looks ok. 

So, to make it easier, the steps are:

1. find out how much room you need - measure your top and measure your body, and see the difference. OR, measure the smaller top against another one that fits good. substract the smaller from the bigger, and that's how much fabric you need (it's width). 

2. the easiest method would be to insert strips at the side seams. divide the width from above by 2, since there are 2 side seams in a top - the ones going from the armpits down to the waist and to the elbow/wrist. 

3. find a similar weight fabric or texture, and cut 2 strips equal in width - the value from point 2. Add some extra for seam allowance. Ideally, these strips would be the same length as your top, but feel free to be creative here. Don't forget about the hem on the lower part and at the sleeve, so they might need to be longer than your top. 

4. cut the side seams of your tshirt. 

5. sew the strips of fabric to the open edges of your top. And you're done!

© Charly Cross 2013 - present. All rights reserved.

Voir les commentaires

Changing a jacket' sleeves

Publié le par Charly C.

Hello all! 

I had a thin Zara jacket with faux leather sleeves. I bought it several years back during the summer sales, if I'm not mistaken. But as it goes, faux leather started peeling and I don't like that. I don't know who likes peeling leatherette, to be honest.  So, I thought to myself that I won't be wearing the jacket anymore though I could try to change its sleeves now that I have some good fabric shears and a decent sewing machine. I also have a few books that teach how to make sleeves and attach them to the garment. The only downside was that I would be ruining the pretty (and very cheap) fabric A got me (from a second hand store. It was there because someone cut it twice on bias, and it probably wasn't enough for their project.) 

So, my thoughts were:

  • I wanted to make something with the fabric
  • I HAD to use it (the fabric) in the end, somehow
  • the fabric was cheap - about $1 for a yard or so? I didn't measure it, sadly. 
  • I wasn't going to wear the jacket anymore
  • I would be learning something
  • I received encouragement to "just go for it!"

I don't think I needed more excuses. So I started with ripping the seams apart because I wanted to use the existing sleeve as pattern for the new sleeve. 

  • the sizing was the right one, especially the arm-hole
  • the length was ok - i could always cut a few extra cm if needed, which I did anyway.
  • I wasn't in the mood to learn how to make a sleeve pattern from scratch. That day will come, but it wasn't this day. 

Sadly, I don't have pictures for all the steps :( I thought of taking pictures when it was too late. Some steps don't even need pictures because anyone can do those with the right tool.

the process

I started by removing the sleeves from the body of the jacket using the seam ripper. My sleeves also had zippers, so I also removed those after. 

Once I had my sleeves, I took one and I placed it flat on some newspaper to make a sleeve pattern, so I can cut the new sleeve from some fabric. I placed the fabric folded over.  When I cut the fabric, I included more seam allowance vertically, but not for the width. 

I didn' like what the fabric felt against the skin, as I knew I would wear this jacket over a tshirt as well. This meant I had to find some fabric to make a lining. The fabric I found is brown and ugly, but serves the purpose just fine. 

You can't really tell from the picture, but first I sew the sleeve to the lining (former sleep wear i believe) at the wrist-end. I then pinned down the sleeve to the rest of the fabric, and then I cut the lining. (note 1)

I also sew the lining to the tartan, before assembling the sleeve together. I figured that shiny and slippery fabric would be difficult to work with if it's not attached. I also ran a zig-zag stitch. (note 2)

Originally, the previous sleeves did have lining as well. I couldn't use it though. The seam allowance was fraying badly. Additionally it was shorter, because the leatherette was folded over some, like the sleeves on suits and coats. 

As I said, I wasn't going to learn how to make such sleeves. This means that the brown lining can be seen at the wrist level, on my sleeves. It also looked ugly. I decided to run a top stitch to see if it looks any better, and it did! See the picture below.

If you do a sleeve like I did here, I highly recommend you do the same. In my opinion, the piece looks 'done more professionally.' You can do this top stitch AFTER sewing the sleeve, so that  the seams would lay flat against your wrist, and rub less. If I ever do this again, I'll know what I need to improve :)

 After my sleeves were complete, it was time I attached them to the body of the jacket. The sleeves I made were a bit larger than the arm holes of the jacket. I started pinning the sleeves starting at the armpit seams going to the top. At the shoulder part, I needed to create 2 pleats. Gathering the fabric is an option, but not for this lined tartan. The pleats give the sleeves a more structured, put-together, "professionally done" look, in my opinion.

And this is the final result! What do you think? 

extra step

However, before attaching the sleeves, I decided I wanted some lining for the back part of the jacket as well. I used the same ugly brown one as for the sleeves. The jacket is very thin, and the spring was cold this year. I wanted some protection from the wind, and the lining would provide just that. 

I used the back of the jacket to serve as guide for a pattern, drew it on paper, cut the brown fabric, and sew it onto the seams of the jacket. I don't have more pictures, sorry. :( 

 That's about it! Don't skip reading the notes below to learn what I wish I did differently.

See you soon! 

Note 1: The funny thing is that while I tried to sew the right side of the tartan fabric to the lining, i only managed with one sleeve. The other one, the tartan is on the wrong-side. I obviously saw too late. I didn't and won't go back to fix it. 

Note 2: I wish I assembled the tartan first into a sleeve, then the lining, and then attach the tartan to the lining at the wrist. I thought of this too late. 

Note 3: This project is from April 2019. I didn't get to watermark the images. Now with my arm in a cast, doing so is more difficult. 

© Charly Cross 2013 - present. All rights reserved.

Voir les commentaires

Homemade vegetarian pizza -recipe

Publié le par Charly C.

Hello all~~

I have no idea who doesn't like pizza. But there are people out there that have dietary restrictions, and so ordering pizza can be difficult. For us, it is a little overpriced, depending on where you oder it from and it's not always good either. 

A's mom started making pizza at home, and it's a really good one too. spicy, with lots of ingredients, and several of them. one is big enough to fill you up, especially if you don't eat a crazy amount of food at once. But A's mom moved out of city, and it's difficult or us to go there to get pizza if we were to ask her to make some. Also getting the ingredients is difficult for A's parents because they don't own a car, so they have to either call a cab (it can get expensive) or rely on the public transportation that is not always reliable. 


Long story short, we decided to make our own pizza. A asked for the recipe, and she said she's going to make it. I said "fine" because I think there's a trick to making pizza that I'm not aware of. 

INGREDIENTS:

  • pizza dough -or base, or whatever you want to call it. We can find it already made in stores over here. At Carrefour it's really cheap too. we got 2 packs, with 2 pizza dough in each.
  • 2-3 medium tomatoes 
  • mozarella cheese - ALL the cheese you want or like. make sure it melts, like mozarella cheese does.  
  • 200 grams olives - get the pitted ones or the already sliced ones, you'll save time. 
  • mushrooms - as much as you want, i guess. The pizza in these pictures didn't have mushrooms. :(
  • 1 bell pepper - red would be best
  • corn - we like corn on the pizza. 
  • tomato sauce - you can use pizza sauce, but regular tomato sauce is fine too
  • aromatic herbs -basil, thyme, parsley, whatever you like
  • some ground black pepper
  • some salt
Homemade vegetarian pizza -recipe

NOTES:

You should know there's no set amount of anything when it comes to the ingredients. A just adds "as much as it fits on the pizza dough."

If you're eating meat, you can add salami, sausages,maybe bacon.  Basically any type of meat you like. A says it's a "trial and error" until you find the balance you like.  Of course you can replace some of the ingredients with others, but the pizza made with these ones was by far the best. 

METHOD:

  • Spread the tomato sauce on the pizza dough.
  • Sprinkle with the condiments - or the aromatic herbs you chose.
  • Add cheese. The more the merrier. ;) It's better to slice it before putting it on the pizza
  • Then add everything else. Make sure to slice the tomatoes, mushrooms and anything that is either too big or has a shape preventing it from staying put on the pizza. Chopped also works.
  • Add more condiments on top. 
  • Bake for 15 minutes, on a really high heat setting, on baking paper. Our oven has a special "pizza" setting, and anymore than 15 minutes in the oven can burn it. NOBODY likes burnt pizza. 

Now you can enjoy it straight from the oven, though leaving it for the next day is perfectly acceptable too. 

Bon appetit~~

© Charly Cross 2013 - present. All rights reserved.

Voir les commentaires

1 2 > >>