

/image%2F2671538%2F20210419%2Fob_819872_img-0313.JPG)
Fool proof doughnuts
Hello world~~
DISCLAIMER: This article was originally published back in 2013. I edited it once, to add another picture, because i though the presentation lacked a little. Now, in 2020, i remade these doughnuts, and i took more pictures. I want to add them here, so this means this article will be republished.
My friend showed me the recipe for these doughnuts on a local website and since I had all the ingredients, I figured I should try it out.
The best part is that they’re done so fast, you don’t need to wait for the dough to raise, and they’re very yummy and light! You’ll want to double the quantities the 2nd time around, hehe ;)
You probably won’t believe me, but even a 14 year old boy made these, or it was him sharing the recipe.
The pictures in this article/recipe are mine.
/image%2F2671538%2F20201122%2Fob_56f0c1_5439dd1206a76b793269566eaac776dd125113.jpg)
The original, sad picture i used. oh, gosh.
INGREDIENTS
- 200 grams yogurt
- 1 egg
- 3 spoons sugar
- some baking powder
- 1 pinch of salt
- 150 grams flour
- 1 Tbsp lemon peel – lemon essence works fine too.
I have to mention that this year we learned my friend can't eat a lot of things, including gluten, or at least not a lot of it.
So you can replace regular flour with gluten free flour or whole grain flour.
This year i also skipped the lemon peel (zest) or essence as well. Instead, i used vanilla extract. My friend was diagnosed with asthma, and lemon essence is bad for them, as some of you may know.


I wish mine turned out this pretty :(
METHOD
Mix all the ingredients together. Originally, I was supposed to add them one by one, but we want to be as quick as possible, even if we stay the whole day at home.
Make sure everything is well incorporated though. The dough should be a bit thicker than the mayonnaise. Thicker dough will make rounder doughnuts, while a thinner one will turn into funny looking doughnuts.
I forgot to take a picture of the dough after i mixed it. Therefore, here you can admire my dough almost at the end.
/image%2F2671538%2F20201122%2Fob_db1b57_dc988f93e0ad78f8a0383abb045c5f879de409.jpg)
My dough was thicker, thus the doughnuts have a more regular, ball-like shape.
This is the time to adjust the sweetness, by adding more sugar if you so wish. Of course, this means you'd have to taste the dough. Make sure not to eat it all. Whatever you may add, incorporate well once again. It should be smooth.
You can even add more flour, to make the dough thicker. IT should still be a bit runny though. My spoon is a hint to why.
At this point I added some grounded nuts back in 2013. - Side note: Reading this in 2020, i recall no such thing, but it must have happened.

What mine turned out like :(
You'll now need a small pot or a frying pan.
You need to have a thick layer of oil for frying in there. As you may know, doughnuts need to be fried.
Heat the oil up. Don't use too much heat. I used low to medium heat. I kept it constant.
Take a spoon, scoop dough out and drop it in the pan. You can fry more at once, depending on how big your pot or pan is.
/image%2F2671538%2F20201122%2Fob_95625c_e1892b5302d0f225cd90e364f7cea61660a3b2.jpg)
I could fit about 6 in my pan. It's normal for the doughnuts to have "legs" or whatever you want to call the little drops that fell from the spoon, next to the actual doughnuts.
The softer/thinner the dough, the more such "legs" will form. These "legs"are also a bit wasteful, because they get burned and nobody will eat them. I think i added more flour to make the dough thicker to have less waste.
You'll fry them on both sides, until they become golden/brown. They'll start floating at some point. That's when you'll turn them on the other side.
If you feel they become brown too fast, lower the heat a little. I cook with gas, so i can't really tell you how high my flame was. It was one of the largest burners, which was a bit too much for this smallish pan.
/image%2F2671538%2F20201122%2Fob_186e61_393fabce925fa04cf7e0599f59a9b38d654540.jpg)
You'll have to turn then around to check their color, to be even on both sides.
When the first ones are done, remove them to a plate, or a large bowl. Make sure to use a paper towel on the bottom, as the doughnuts will still leak some oil. You don't want the ones at the bottom to sit in a puddle of oil, ewww.
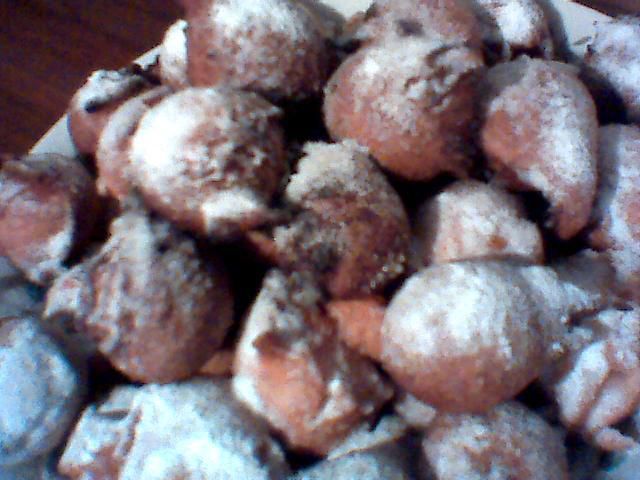
When you’re done frying all of them, just sprinkle them with confectioner’s sugar, chocolate syrup, or anything else you prefer for more yummyness.
/image%2F2671538%2F20201122%2Fob_2f8974_14c4acee6c024a0c708cdb5737c2d6f15a3adb.jpg)
Bon appetit!
© Charly Cross 2013 - present. All rights reserved.
entry edited in May 2018 first, then in 2020. all pictures are mine.


/image%2F2671538%2F20201118%2Fob_1a6bd2_b8df789c336f4862b4eaecced3c94d3f.jpg)
/image%2F2671538%2F20201121%2Fob_16a095_9c98ea30061c7a8efa476068a5ff3938bc4fb9.jpg)
/image%2F2671538%2F20201121%2Fob_fd7f63_be5a41cd7ec3b3d220ff95ef7ed7c838ea70e0.jpg)
/image%2F2671538%2F20180226%2Fob_f9c4d6_charly.png)